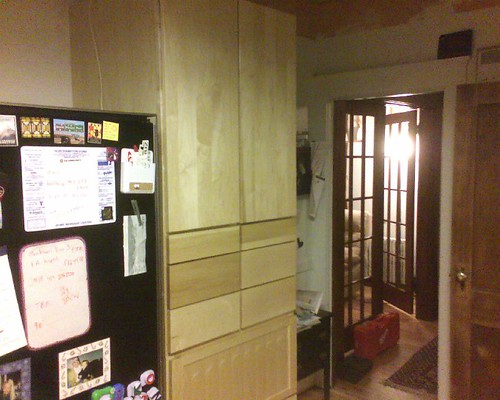
Sunday evening I finally got to the cabinets I've been referring to as the "refrigerator stack." The stack consists of a two drawer base cabinet with two multipurpose 24" deep wall cabinets on top. There's a fridge top cabinet and a wall panel to complete the bridge over the fridge, but that's something for the next few weeks.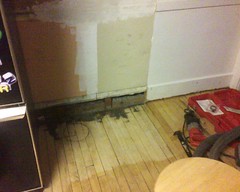
Anyway, here's how it all went down. First I prepped the floor area and removed the last parts of the baseboard so the base cabinet could sit flush with the wall. That's neighbor Jon's Sawzall. Mine (handed down from my Father-in-Law) would have worked just fine - it's an orginal all poslished metal Milwaukee - but since I happened to be over next door when Jon had his handy, I used his. He's got some nice tools.
Next I patched the wall. I just couldn't see putting in a semi-permanent cabinet and not patching a hole in the plaster.
Then I anchored the base cabinet after leveling it with shims. Finally I clamped the face frames of the wall cabinets together and secured them with four 2-5/8" square drive deck screws. Then I enlisted Jon's help and we hoisted these puppies onto the base cabinet.
At that moment M came home with Nonni and Gampa and ran into my arms. As I showed her my work (she pointed out I was dirty and asked why I made such a mess) she gave me the biggest hug. I'd only been away from her for less than 24 hours but I still missed her terribly. She's such a sweetheart.
While bags were being brought in, I anchored the top units to the base cabinet (again using the Scorpion ceramic coated deck screws) and to the wall studs. Then I replaced the doors and drawers and voila!
Monday, January 30, 2006
Wall Cabinets Deux
Wall Cabinets
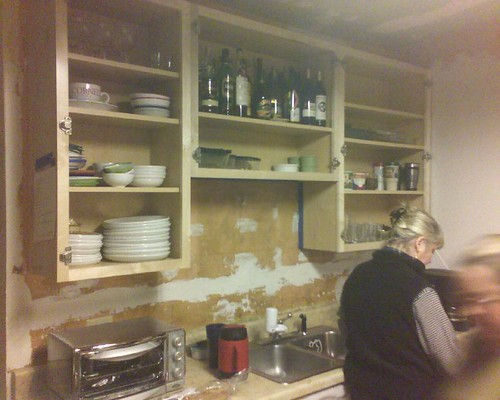
This weekend was all about wall cabinet installation. I myself have never hung wall cabinets, but with a few good tips gleened from hither thither and yon, I made an act like I knew what I was doing.
N and I together took down the old cabinets (they're to eventually grace the wall of our wood shop in the basement) and relocated them downstairs, and then set about getting these new cabinets ready to mount.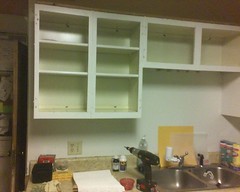
First we mounted a 2x4 to studs across the wall, leveling it with our new 4' level. I used 8#x3" deck screws. N was unsure about removing the backsplash, since we're still going to be using the sink while the rest of the cabinets are installed, but we eventually realized we needed to rip that off the wall. It didn't come off without a fight. N took a moment or two of down time to patch and tend to the wall. I've thought about a stainless backsplash, but Jon next door and N both think it might be too cold. "Walk into Friendly's down the street and ask to check out their kitchen," I believe was the sentiment.
Then we clamped the face frames of the trio together and drilled pilot holes for the square drive 2-5/8" ceramic coated deck screws. I drove those in and then fabricated some 1/2" spacers for the backs to keep them together.
Finally, N and I hoisted the cabinets onto the countertop and then up onto the 2x4 mounted on the wall. From there it was just anchoring the units to studs with 3" decking screws. Pretty simple. N couldn't resist getting on the phone with her headset and chatting up the work we were doing. It reminded me somewhat of a play by play. 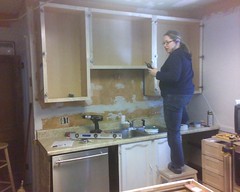 The cabinets are level and plumb. Sweet.
Velvit Oil
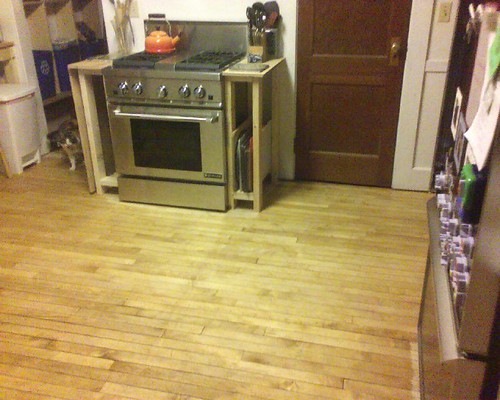
Last weekend, Jan 21-22, was Velvit Oil Weekend here. I finish-sanded the floors of the pantry, downstairs bathroom, and kitchen, and then applied Velvit Oil with a wool pad on a stick. Nice!
This was quite a job for one, but it turned out okay. The fumes were alright, kept manageable with the window open on a 20 degree day. I turned the heat down to 50 and wore my respirator, a chamois shirt, my trusty carharts and a purple bandana over my head. I was alone on my knees in the house, with only the sound of the Porter Cable sander muffled by the plugs in my ears. I hardly ate, drank or slept for two days. But I mostly finished. You can see the color of the untreated floor in front of the refrigerator and range. I'll go back in and touch those up when I put on a second coat once the cabinets are in.
Tuesday, January 17, 2006
Flip Down
Here is the counter flipped down to allow access to the pantry. Later this week cabinets arrive and the fun begins. We need to have our electrician put in three new outlets and run a line to where the hood will be installed above the range.
Next up will be plumbing (moving the water lines for the sink over six inches), followed by installing ceiling lighting and the subsequent plaster restoration.
Monday, January 16, 2006
Flip Up
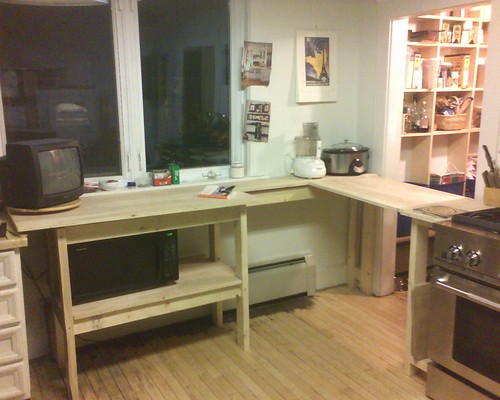
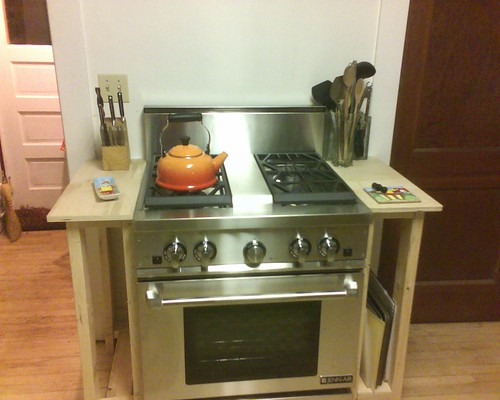
N first mentioned this idea for a flip up counter back in September or October. Once the range arrived and the landing pads were built, the only thing preventing this flip top from happening was the opposite wall's counter base. I took care of that on Saturday.
The flip top took about twenty minutes to install, from cutting the wood (3/4 birch plywood) to screwing in the piano hinge and sash lock. The sash lock might be replaced with a dead bolt, but it holds just fine (and it's steel, so I know it's strong). N has suggested a flip out leg support, which we might have to do once the concrete is in. Once the counters are down, we'll probably have a butcherblock made for the flip up.
Second counter base
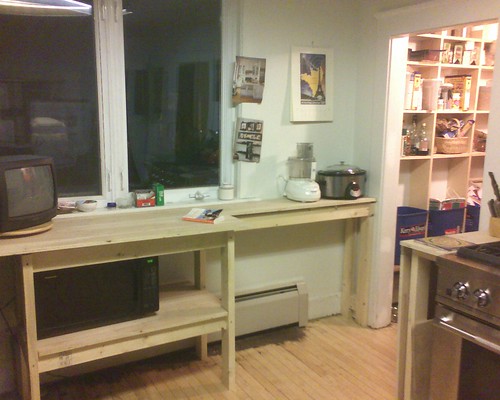
The first temporary counter base ended up being too long. It was going to hinder the installation of our new cabinets (they arrive in early Feb), so I took it out and made a new, simpler counter base.
It fits our big microwave (which N reminded me didn't fit on the first one) and took much less time to fabricate. The old one is now the base of a table in the workshop downstairs. This one will become a laundry folding table once the new counters go in.
Wednesday, January 11, 2006
Landing Pads
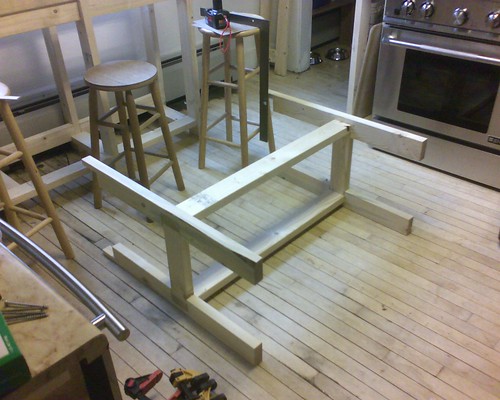
While it's not rocket science, getting the two counters level with the range top was not as easy as I originally thought. I knew the floor wasn't level (since I levelled the range, which took a while), but I didn't put two and two together. I built all the base units together and of course made them all 35 1/4" tall.
A few zips with the Makita and my work is nearly done.
Monday, January 09, 2006
Counter Mock up

This was the weekend's work. The counter design we've come up with will be tested for a month or two before we order up a concrete counter top.
I like the clean lines of the mock up though. It can be replicated with concrete.
Next up is a flip up and lockable cutting board that will bridge the landing pad to the left of the range with the counter where the crock pot and cuisanart sit in the photo. It's flip up to allow access to the walk in pantry. I guess it could also be used as a bar area for parties - we're always thinking about dual purpose, even if it's a Dwell magazine style stretch!
Home cooking
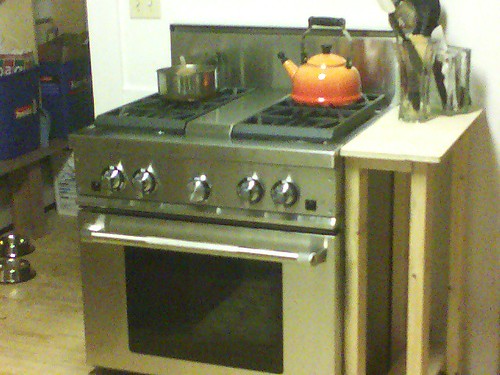
Appliances arrived this weekend and already have been put to use. The counter on either side (we call them "landing pads") is being mocked up. It's just 2x4 framing with 3/4 birch tops, but it looks and feels nice. It should give us a good idea of how the counters will function prior to the concrete counters going in. Always a good idea to test it out before you buy!
Friday, January 06, 2006
Shmancy Pantry
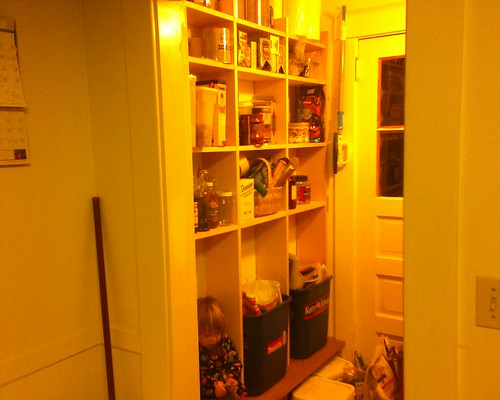
With recycling taken care of (3 bins for paper, mixed, and redeemables) this wall in the pantry is schmancy. The base is elevated as a bench over a steam base board radiator. It is Mahogany, because I had already joined two boards together and pine just wouldn't have worked. The rest is pine. It will all be coated with shellac. At least that's what I keep saying.